In this article we will show you how to create a subdomain on your domain registered with Hostinger.
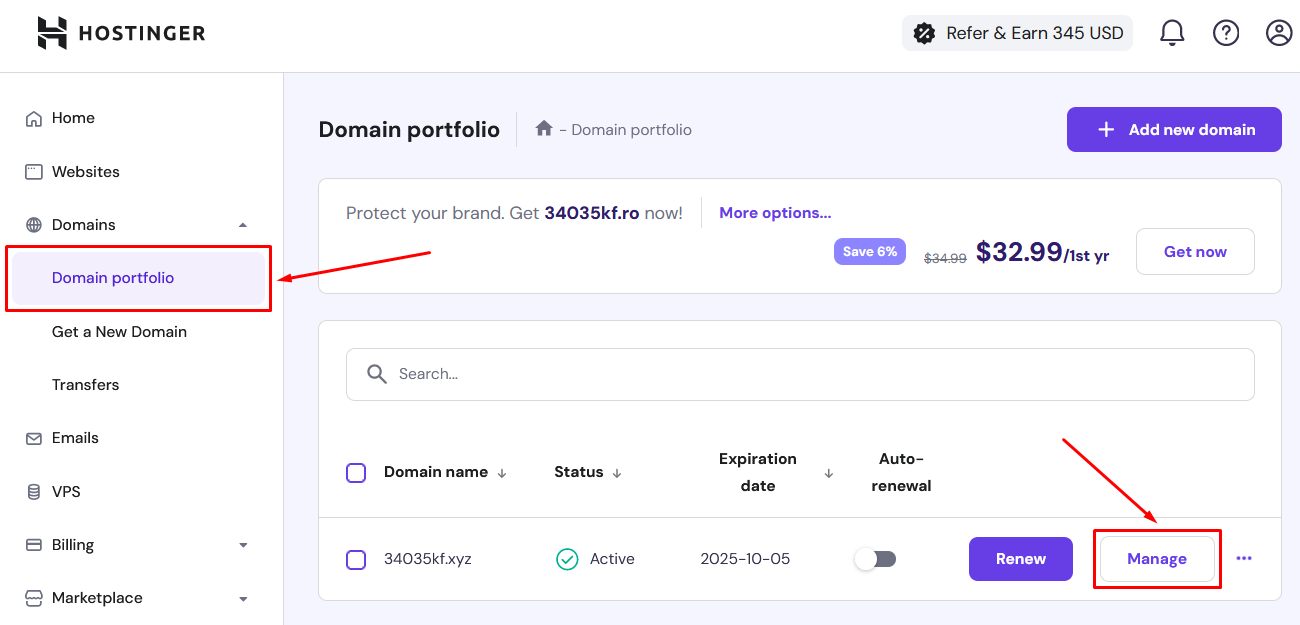
1. After you log in to your Hostinger account, follow to Domains -> Domain Portfolio on the left and click on the Manage button next to your domain
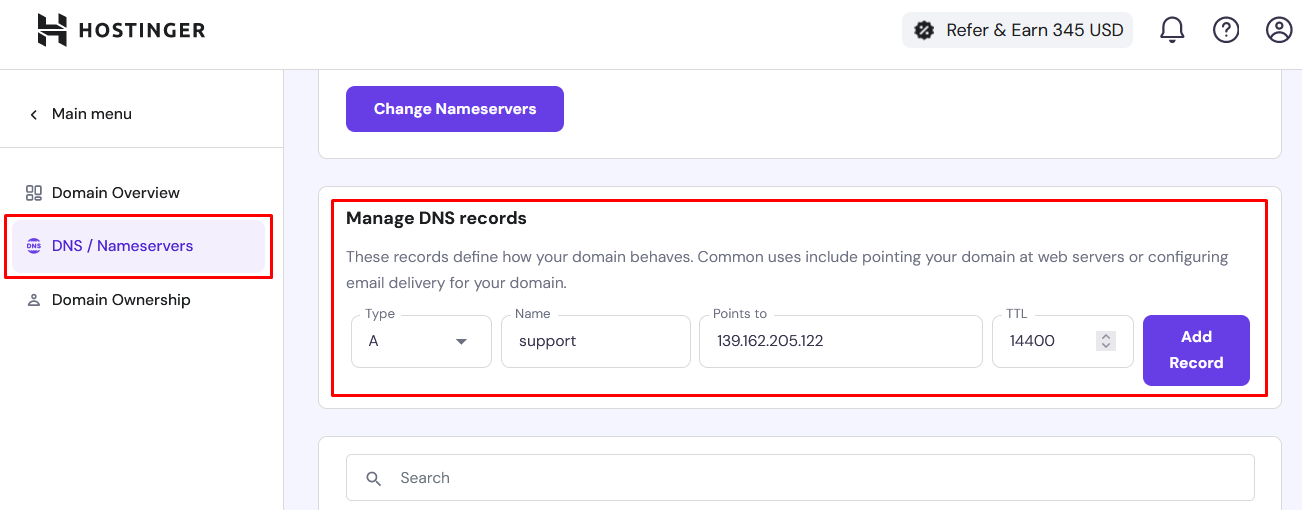
2. Switch to DNS / Nameservers on the left and scroll down to Manage DNS Records section. Fill the form:
- In the Type field, choose the first option - A
- in the Name field, enter your subdomain name. It can be any word or a combination of letters and digits
- In the Points To field, enter the IP provided to you by Provide Support (you can find this IP here)
- Leave the rest of the settings intact and click Add Record
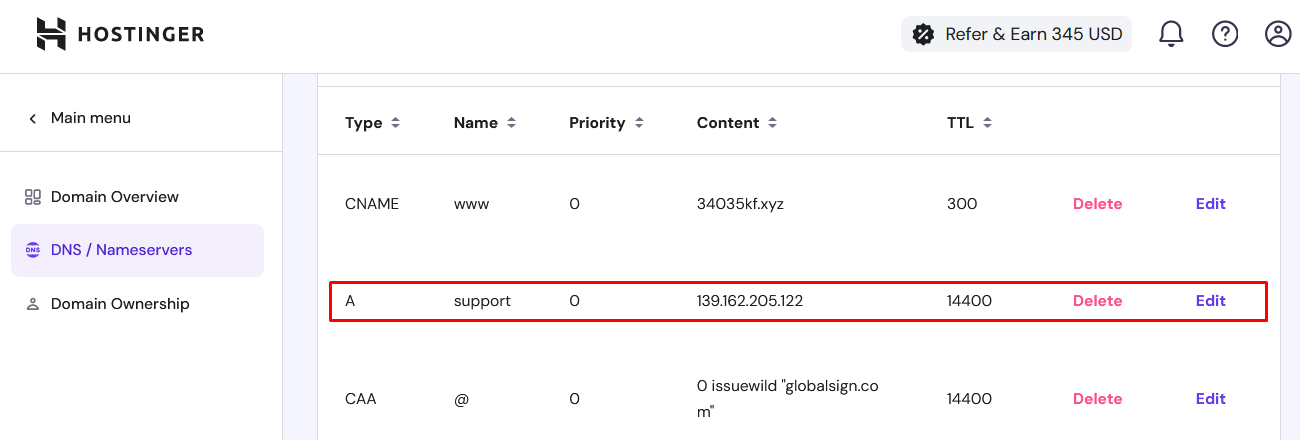
3. You should see your new record appear in the list