In this article we will show you how to create a subdomain on your domain registered with Namecheap.
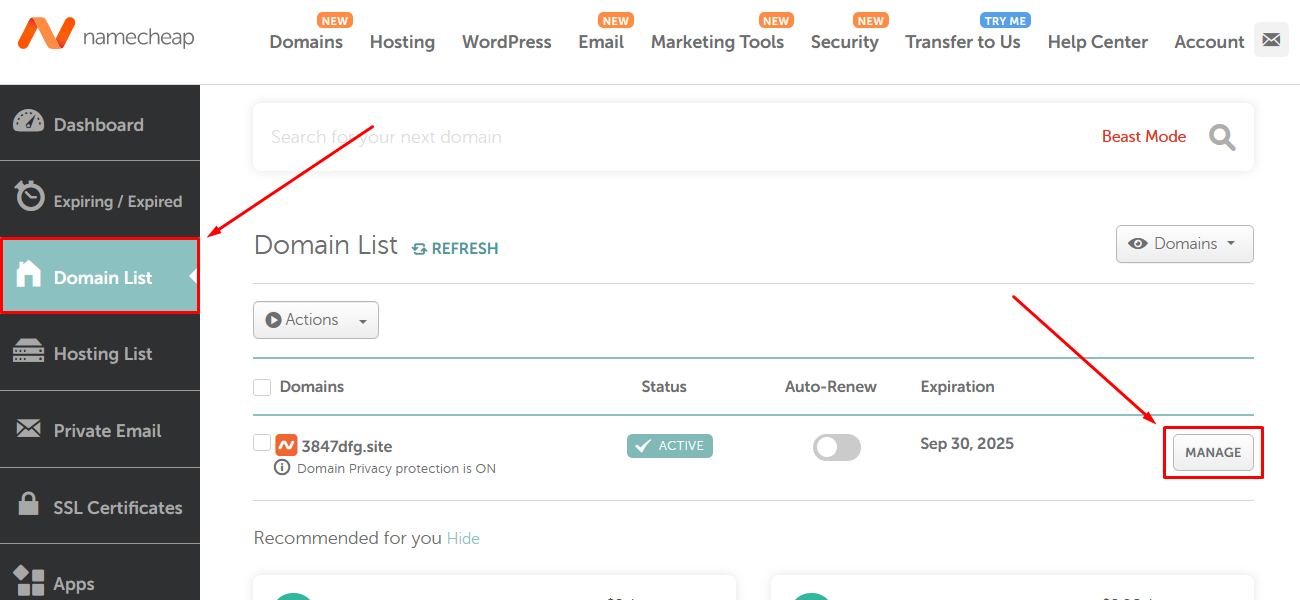
1. After you log in to your Namecheap account, click Domain List on the left and then click Manage next to your domain
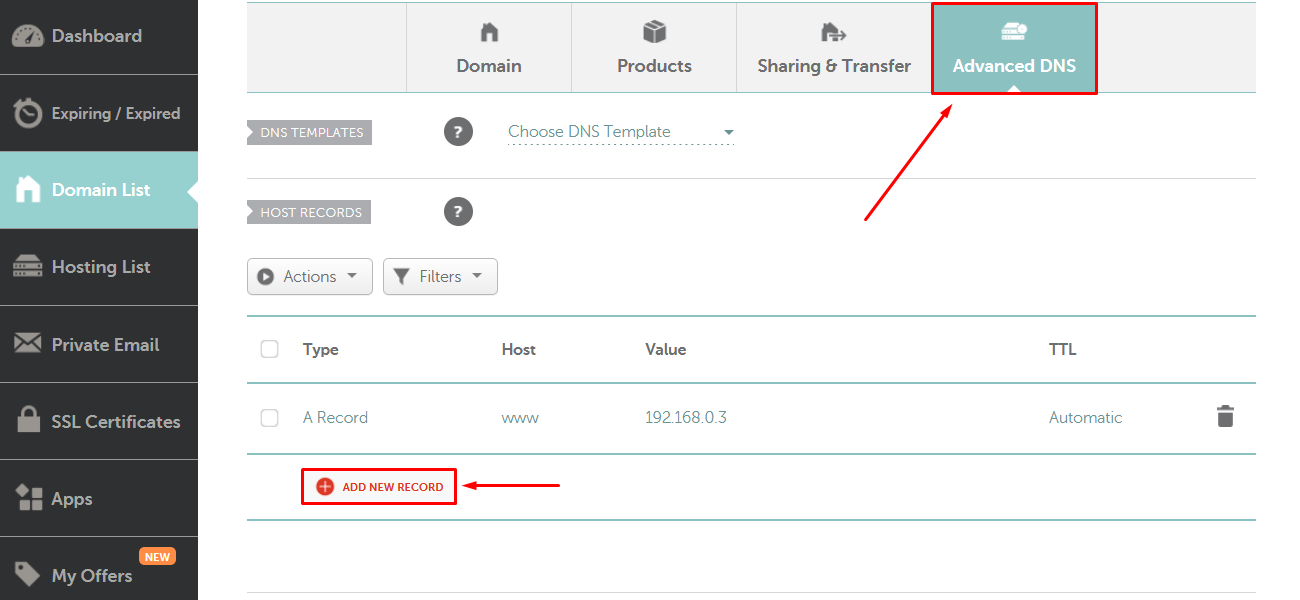
2. Switch to the Advanced DNS tab and click Add New Record
3. In the form that appears, choose the following:
- in the Type field, choose the first option in the list - A Record
- in Host field, type your subdomain name, which can be any combination of letters and digits
- In the Value field, enter the IP provided to you by Provide Support (you can find this IP here)
- Leave the TTL setting intact
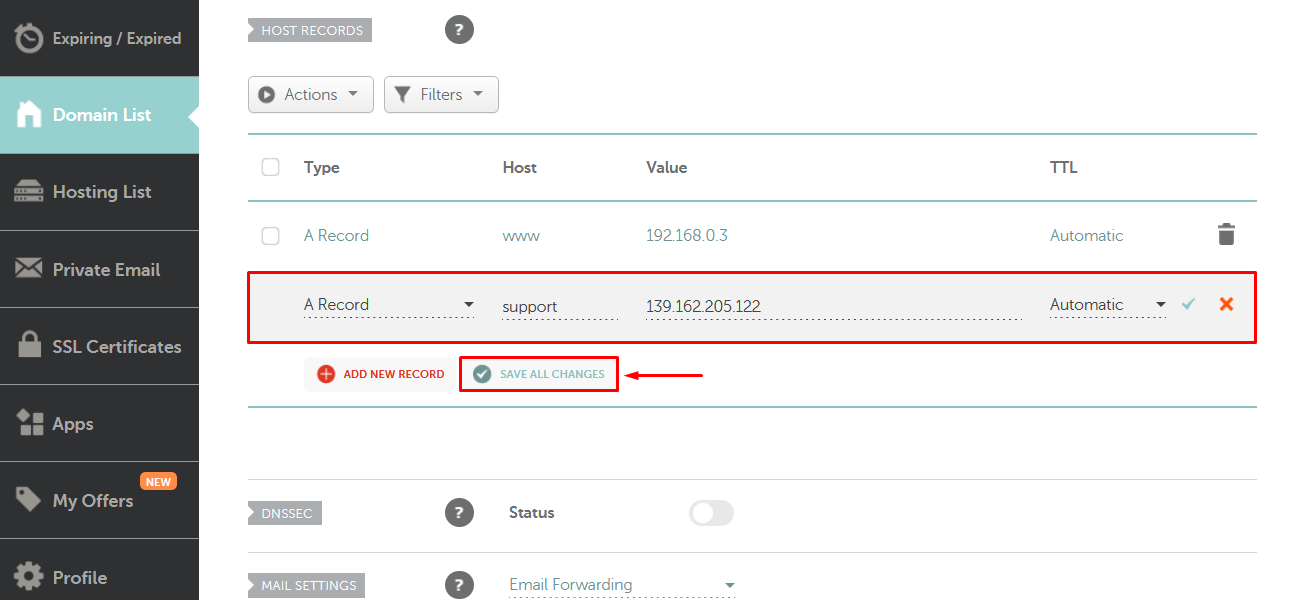
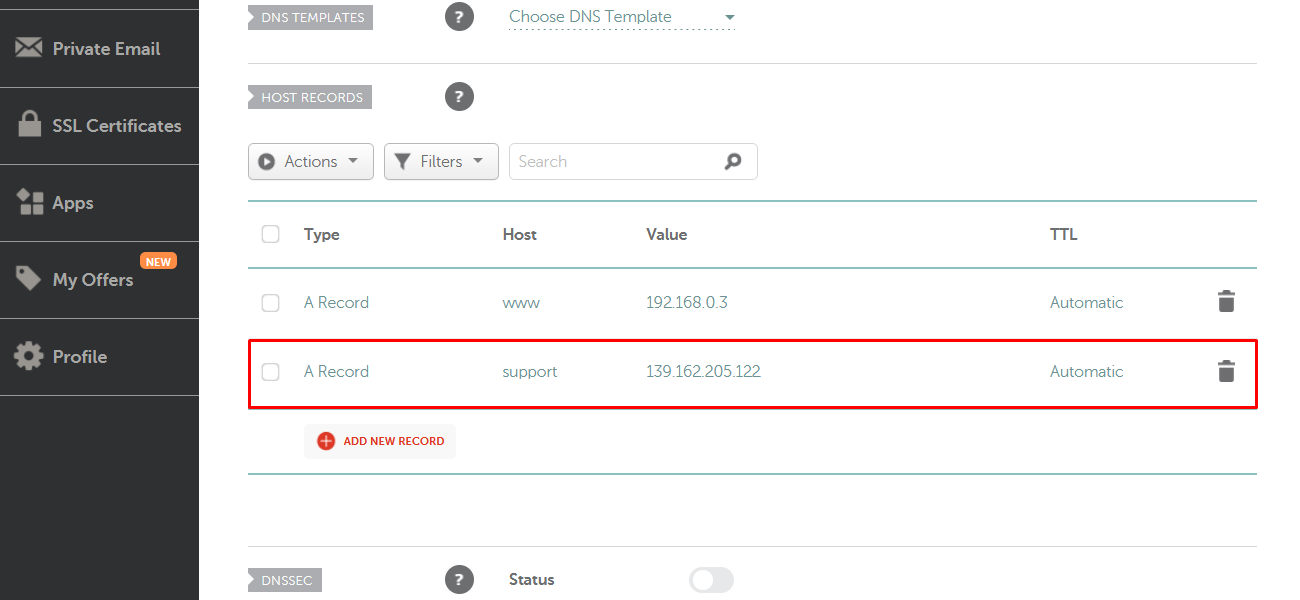
4. After you click Save All Changes, you should see your new record appear in the list